Peeling paint is one of the most common issues homeowners encounter. Over time, exposure to moisture, fluctuating temperatures, and the natural wear and tear of a house can cause paint to lose its grip, resulting in unsightly flakes or bubbles. Not only does peeling paint detract from the aesthetic appeal of your home, but it can also expose the underlying surfaces to further damage. Fortunately, fixing peeling paint is a manageable task with the right approach.
In this comprehensive guide, we’ll explore why paint peels, the tools and materials you’ll need, and a step-by-step guide on how to fix peeling paint. Whether you’re dealing with minor peeling in a corner of your home or larger sections, this guide will equip you with the knowledge to restore your walls to their former glory.
Why Paint Peels: Common Causes
Before diving into how to fix peeling paint, it’s important to understand why it happens. By identifying the cause, you can prevent future occurrences.
1. Moisture
One of the leading causes of peeling paint is moisture. This can come from leaks in the roof, poor ventilation, or high humidity levels. In areas like kitchens, bathrooms, or basements, where moisture tends to accumulate, paint is particularly vulnerable to peeling.
2. Improper Surface Preparation
If the surface wasn’t properly prepped before painting, the paint may not adhere properly. Skipping steps like cleaning, sanding, or priming can leave a weak foundation for the paint, causing it to peel prematurely.
3. Use of Low-Quality Paint
High-quality paint costs more for a reason. Inferior paint often lacks the necessary durability, leading to peeling, cracking, and fading over time.
4. Application of Paint on a Dirty Surface
Dirt, dust, and grease on the surface can prevent paint from adhering correctly. Even if the surface looks clean, it’s crucial to give it a thorough wipe-down before applying paint.
5. Painting Over Old, Flaking Paint
If you apply fresh paint over existing paint that’s already peeling or flaking, the new paint won’t have a solid base to adhere to, causing it to peel.
6. Environmental Factors
Harsh sunlight, extreme temperatures, and the constant freeze-thaw cycles can also cause the paint to expand and contract, leading to cracks and peeling.
7. Poor Ventilation
Rooms that don’t have proper ventilation, especially bathrooms and kitchens, are more susceptible to moisture build-up, which can cause paint to bubble and peel.
Tools and Materials Needed
Before you begin the process of fixing peeling paint, gather the necessary tools and materials. This will ensure you have everything at hand and can complete the job efficiently.
Tools:
- Paint scraper or putty knife
- Wire brush
- Sandpaper (medium and fine grit)
- Paintbrushes or rollers
- Drop cloths or plastic sheeting
- Painter’s tape
- Dust mask
- Safety goggles
Materials:
- Patch compound or spackling paste
- Primer (stain-blocking or moisture-resistant, depending on the cause of peeling)
- High-quality paint (appropriate for interior or exterior use)
- Caulk (if there are gaps or cracks)
- Cleaning solution (such as TSP or a mild detergent)
Step-by-Step Guide: How to Fix Peeling Paint
Now that you’ve identified the cause of the peeling and gathered your materials, it’s time to start the process of repairing the peeling paint. Here’s a detailed step-by-step guide to help you along the way:
Step 1: Protect the Area
Before beginning any repair work, it’s essential to protect the surrounding area from dust, debris, and paint splatters.
- Lay down drop cloths to cover the floor and any furniture in the room.
- Use painter’s tape to protect trim, baseboards, and other areas adjacent to the peeling paint.
Step 2: Remove the Peeling Paint
The next step is to remove the peeling paint entirely. You want to ensure that all loose or flaking paint is removed so that the new coat will adhere properly.
- Use a paint scraper or putty knife to carefully remove the loose paint. Hold the tool at a slight angle and gently push it under the edges of the peeling paint.
- Scrape until no loose paint remains. Be careful not to gouge the surface beneath the paint, especially if you’re working on drywall or wood.
- For stubborn areas, use a wire brush to scrub the surface gently. This will help remove smaller flakes and provide a smoother surface for the next steps.
Step 3: Sand the Surface
After removing the peeling paint, the next step is to smooth the surface with sandpaper. Sanding will ensure that the new paint goes on evenly.
- Use medium-grit sandpaper (like 120-150 grit) to sand the area where the paint peeled. You want to feather the edges of the remaining paint so that there’s no noticeable transition between the old and new paint layers.
- For larger areas, consider using an electric sander to speed up the process.
- Follow up with fine-grit sandpaper (220 grit) to achieve a smoother surface.
- Wipe the area clean with a damp cloth to remove dust and debris left from sanding.
Step 4: Repair the Surface (if needed)
In many cases, peeling paint may expose surface imperfections, such as cracks, holes, or gouges. These will need to be repaired before painting.
- Use a patch compound or spackling paste to fill in any holes or cracks. Apply the compound with a putty knife and smooth it out until it’s flush with the surface.
- Let the compound dry completely (refer to the product’s instructions for drying times).
- Sand the patched areas with fine-grit sandpaper to ensure a smooth surface.
- Wipe away dust with a clean, damp cloth.
Step 5: Prime the Surface
Priming is a crucial step in fixing peeling paint. It helps the new paint adhere to the surface and prevents future peeling, especially if moisture was the culprit.
- Choose a primer suited for your surface. If the peeling paint was caused by moisture, select a moisture-resistant or stain-blocking primer.
- Apply a coat of primer to the sanded area with a paintbrush or roller. Ensure that you cover all areas where paint was removed or where repairs were made.
- Allow the primer to dry completely (check the manufacturer’s instructions for drying times).
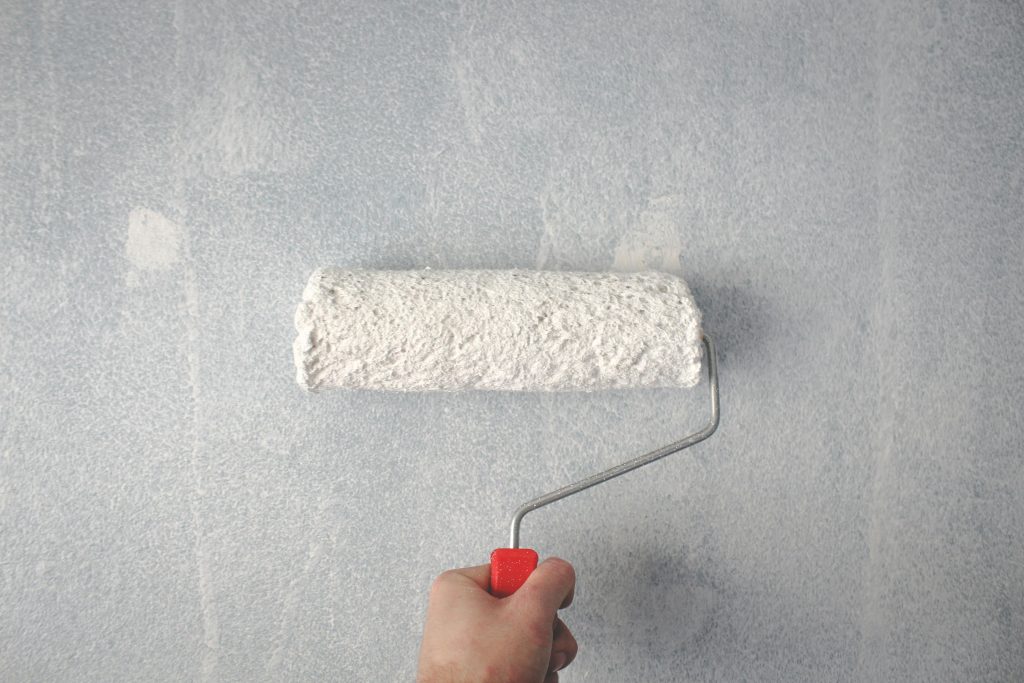
Step 6: Apply the New Paint
Once the primer has dried, it’s time to apply the new paint. Be sure to choose high-quality paint to prevent future peeling and provide a durable finish.
- Stir the paint thoroughly to ensure consistent color and texture.
- Use a brush or roller to apply the paint in smooth, even strokes. If you’re painting a small patch, a brush may provide more control. For larger areas, a roller will ensure quicker coverage.
- Blend the new paint with the surrounding areas. If you’re painting over a small patch, feather the edges of the paint to blend it into the existing paint.
- Allow the first coat to dry fully (refer to the manufacturer’s instructions), and then apply a second coat if needed for full coverage.
- Let the paint dry completely before removing painter’s tape and moving furniture back into place.
Step 7: Prevent Future Peeling
Once you’ve successfully fixed the peeling paint, it’s important to take steps to prevent it from happening again. Here are some tips to help maintain your freshly painted surface:
1. Address Moisture Issues
Since moisture is a primary cause of peeling paint, it’s essential to address any underlying moisture issues. This may include fixing leaks, improving ventilation in moisture-prone areas like bathrooms and kitchens, or using dehumidifiers to reduce humidity levels in your home.
2. Use Quality Paint and Primer
Always invest in high-quality paint and primer. These products are designed to provide better adhesion, durability, and resistance to peeling and cracking. Additionally, make sure you select the appropriate type of paint for the room, such as moisture-resistant paint for bathrooms or kitchens.
3. Properly Prepare the Surface
Ensure that all surfaces are properly cleaned, sanded, and primed before painting. Surface preparation is key to ensuring that the paint adheres well and lasts for many years.
4. Maintain Your Home’s Exterior
If you’re dealing with peeling paint on your home’s exterior, regular maintenance is key. This includes sealing any cracks or gaps in siding, windows, or trim, and ensuring that gutters and downspouts are functioning properly to divert water away from your home’s foundation.
5. Control Humidity Levels
In areas prone to high humidity, use exhaust fans or dehumidifiers to control moisture levels. This is particularly important in basements, kitchens, and bathrooms.
6. Touch Up as Needed
Even with the best preparation and paint, wear and tear can happen. Keep an eye on high-traffic areas and be prepared to do small touch-ups if you notice any chipping or peeling early on.
Conclusion
Fixing peeling paint doesn’t have to be a daunting task. With the right tools, materials, and a bit of patience, you can restore your walls to their former glory. By following this guide, you’ll not only repair the damage but also prevent future peeling, ensuring that your home’s paint job remains beautiful and durable for years to come. Whether you’re tackling a small touch-up or a larger project, proper preparation